I use a simple, budget-friendly route to reduce lag and get clean audio video in my streams and recordings. The Vivitar Creator Series HDMI to USB Video Capture Card costs about $20 and delivers 1080p HD, so I get solid video quality without breaking the bank.
When I set up my capture device in OBS Studio, I focus on three things: lowering delay, easing CPU load, and confirming audio input. I test audio input capture so the console sound reaches my headphones, and I tweak audio monitoring so I can hear audio live while recording.
Zero-lag recording is achievable if you pick the right USB device, limit extra sources, and set defaults that match your system. I make sure to test the source, check properties, and monitor output before every session to avoid troubleshooting mid-stream.
Key Takeaways
- Affordable devices like the Vivitar USB option can deliver 1080p and low cost.
- Minimize delay by choosing the right capture device and lightening CPU load.
- Always test audio input capture and set audio monitoring to hear audio in real time.
- Confirm source properties and output defaults before recording or streaming.
- Small tweaks to video and audio can solve most connection or signal issues quickly.
Understanding the Role of Capture Cards
When I route my console through a reliable device, the video and audio arrive on my computer cleanly and on time.
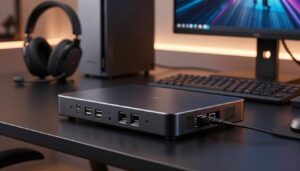
The main job of a capture card is to act as a bridge. It grabs video capture data from an external console, like an Xbox Series X, and sends that feed to my PC for streaming or recording.
I rely on high-quality cards because they process the signal better. That keeps video quality steady and prevents drops during a long stream.
For example, the Elgato HD60 X is widely used for 1080p60 from systems like the PlayStation 5. It handles both the video stream and the audio input so I can monitor gameplay with minimal lag.
“Routing both audio and video through a dedicated device makes my stream look and sound professional.”
- I can keep my monitor in real time and avoid input lag.
- Good hardware reduces processing work on my computer and improves overall quality.
- Checking device properties and audio input routing helps prevent surprises during a session.
Essential Hardware for Your Setup
I always start by verifying cables and ports before I touch any software options.
Good USB 3.0 cables keep the video capture signal strong and steady. I use high-quality leads to avoid interference and dropped frames.
When audio input quality dips, the first thing I check is the physical connection to the card. A loose or worn plug causes most common problems.
Cables and Connections
I recommend testing different USB ports on your laptop — not all ports share the same bandwidth. My laptop has three ports, and choosing the right one made my setup reliable.
Use proper cables from console to device so you don’t lose video or audio data. If a link seems flaky, swap the cable and try another port before changing any settings.
| Item | Why it matters | My tip |
|---|---|---|
| USB 3.0 Cable | Maintains high bandwidth for 1080p and audio | Buy a shielded, short cable under 2 meters |
| Correct Port | Prevents bandwidth bottlenecks | Try each port if you see dropouts |
| Console-to-device Lead | Ensures no loss of video or sound | Replace frayed leads immediately |
| Physical Check | Fast way to diagnose input issues | Wiggle plugs gently to test contact |
Configuring OBS Capture Card Settings
I open File in the top-left and start by creating a fresh profile for my recording. This keeps my live stream profile untouched and makes rollback easy.
Next I verify that my video capture source shows up. Configuring the capture device correctly is the most important step to ensure the video and audio inputs are recognized by the software.
I add an audio input capture source and name it so I can find it fast. I use that source to pull audio from the device into my project. It reliably brings console sound into the file I record.
I then tweak the sampling rate and monitor balance to keep audio and video in sync. Small changes in input latency or frame rate can fix sync problems before they appear in a stream.
- Start at File and make a new recording profile.
- Confirm the device is detected and add an audio input capture source.
- Adjust sample rate and monitor to match video capture timing.
| Action | Why it matters | Quick tip |
|---|---|---|
| Create profile | Prevents changes from affecting live stream | Name profiles by purpose |
| Confirm device | Ensures video and audio appear in software | Reconnect USB if not listed |
| Add audio input capture | Brings sound from the device into recording | Label the source for fast edits |
Adding Video Capture Device Sources
Adding a dedicated source for my gameplay feed keeps things tidy and makes troubleshooting faster. I add each feed as its own source so video and audio remain separate and easy to control.
Naming Your Source
I give each video capture device a clear name, like PS5 Capture or Console Feed. A descriptive label saves time when I switch scenes or edit later. It also helps me spot the right input quickly during a session.
Selecting the Device
When I add a new video capture source, I pick the correct device from the dropdown menu in the add-source dialog. Then I add an audio input capture source alongside the feed so I control the audio level separately.
I right-click the video source and open the properties window to fine-tune the device options. Keeping my sources organized prevents surprises and speeds fixes if a game or screen input stops appearing.
- Name sources clearly.
- Select the proper device from the menu.
- Add an audio input capture for full control.
Integrating Audio Input Capture
I plug in an audio input source early so I can confirm game sound before I start recording. This helps me spot routing mistakes fast.
I add an audio input capture source to my scene and then choose the correct digital audio interface. On my laptop with three USB ports, picking the right USB digital audio interface made all the difference for clean sound.
I watch the audio mixer to confirm the audio input meter moves when the console plays. If the meter stays flat, I check the source selection and connector before diving deeper.
If I cannot hear audio, I open the File menu and verify the monitoring device is set to my headphones. That step fixes most monitor problems and ensures the stream gets the same feed I hear.
Integrating the audio input capture correctly lets me monitor through headphones while sending sound to my stream. It keeps me in control and prevents last-minute surprises.
| Check | Why it matters | Quick fix |
|---|---|---|
| Add audio input source | Ensures console sound is recorded | Select the right digital interface |
| Watch mixer meter | Shows real-time audio levels | Play game audio and confirm movement |
| Set monitoring device | Lets you hear what the stream hears | Choose headphones in File menu |
Mastering Advanced Audio Properties
I tune advanced audio properties to control what I hear versus what my viewers get. This step keeps my mix clean and predictable.
I open the advanced audio properties window by clicking the gear icon next to my audio input capture source in the mixer. That panel shows how each device routes and monitors audio.
Monitoring Modes
I switch the monitoring mode to Monitor and Output when I want to hear the feed and send it to the stream. This ensures my mic and console audio pass through to viewers while I monitor live.
When I need to listen without sending sound to the stream, I use Monitor Only. That prevents echo on the output while letting me check levels and game audio privately.
- I check that each audio input is assigned to the right device and output.
- I balance levels so the video capture audio and my commentary are even for viewers.
- I always double-check these properties after adding a new source to save my monitoring choices.
Adjusting Global Audio Settings
I start by opening the File menu and selecting the Audio tab. From there I set a global monitoring device so every source uses the same output.
It is important that I choose my headphones as the monitor, not the system speakers. That keeps game sound out of my room and prevents echoes on the stream.
I then check each audio input capture source in the mixer. I nudge the volume slider until game audio sits well under my commentary.
On my Windows PC I confirm routing so all devices send audio to the chosen monitor. This makes source management consistent and predictable.
| Action | Why it matters | Quick tip |
|---|---|---|
| Set global monitor in File → Audio | Routes all sources to one device | Pick headphones to avoid feedback |
| Adjust audio input capture slider | Keeps game sound balanced with voice | Lower by 10–20% if clipping appears |
| Confirm Windows audio routing | Prevents devices from using wrong output | Test playback after each change |
Finally, I treat monitoring as the last step. When my monitor device is locked, I can focus on gameplay and trust that audio will reach my viewers clearly.
Optimizing Video Quality and Resolution
I balance resolution and frame rate to squeeze the best-looking footage from my setup. That starts with choosing between the device default and a custom profile in the video capture device properties.
Device Default vs Custom
Device default can be fine for quick tests. But I often switch to Custom so I can force 1080p and set the encoding parameters I want.
Using a custom resolution gives me consistent quality across recordings. It also prevents automatic downscaling that can blur fast motion.
Frame Rate Matching
Matching frame rate is one of my top priorities. I set both the capture card output and my software to 60fps when possible.
When frame rate matches, audio drift and temporal sync issues rarely appear. A steady 60fps makes movement smooth and keeps audio and video aligned during long recordings.
| Action | Why it matters | Quick tip |
|---|---|---|
| Choose Custom resolution | Prevents automatic scaling and preserves detail | Set 1920×1080 for most console feeds |
| Match frame rate | Reduces audio drift and sync issues | Use 60fps if your source supports it |
| Verify device properties | Ensures the output matches recording targets | Check resolution and frame rate before each session |
- I prefer explicit values over defaults to get repeatable quality.
- Confirming the video capture device properties is a quick habit that prevents problems later.
- When everything matches, the final recording looks and sounds professional.
Troubleshooting Common Audio Issues
When audio goes wrong mid-session, I run a short checklist to find the fault fast.

I first close any companion utility like the Elgato 4K Capture Utility. That app can lock the device and stop my audio from reaching the software.
If sound still fails, I remove and re-add my audio input capture source so the program has a fresh reference. I repeat this step if the meter stays flat.
- I run the program as an administrator on Windows to avoid permission blocks.
- I check console output and set it to Linear PCM when needed to restore clear sound.
- Switching USB ports often fixes crackling caused by limited bandwidth for the video capture device.
| Problem | Why it happens | Quick fix |
|---|---|---|
| No sound | Software or source locked | Close utility, re-add audio input capture |
| Crackling | Insufficient USB bandwidth | Try a different USB port |
| Permission fail | App lacks admin rights on Windows | Run as administrator |
Fixing Audio and Video Desync
A tiny timing tweak often fixes the gap between what I see and what I hear.
I use the sync offset field in the advanced audio properties to align audio and video. I start at a 100ms delay and test a short clip. Then I change the value in small steps until the audio lines up with the on-screen action.
I also make sure frame rates match between my video capture device and my recording software. Mismatched frame rates cause gradual drift over time. Matching both keeps audio/video tight for long sessions.
On Windows I disable any audio enhancements so the device sends a raw, clean feed. That removes extra processing that can add delay.
If desync returns, I re-open advanced audio properties and confirm my monitoring mode and monitor device aren’t adding latency. This quick re-check solves most issues during stream or recording.
| Step | Why it matters | Quick action |
|---|---|---|
| Set sync offset | Corrects immediate timing gaps | Start at 100ms, then adjust |
| Match frame rate | Prevents drift over time | Use same fps in device and software |
| Disable Windows enhancements | Removes extra processing delay | Turn off enhancements in Sound panel |
| Verify monitoring mode | Avoids added latency from monitor output | Check advanced audio properties |
Managing Sample Rate Mismatches
A consistent sample rate is one of the easiest fixes for odd audio behavior during recordings.
I set my global sample rate to 48 kHz in the File → Audio area so the capture device and project match. This default matches most consoles and keeps audio clean.
I also check Windows and confirm the system sound uses 48000 Hz. A mismatch there is the most common cause of crackling and odd sync.
Next, I open the advanced audio properties and verify that each audio input capture source uses the same rate as the project. If one source runs at a different rate, audio and video can slowly drift apart over long recording sessions.
| Check | Why it matters | Quick fix |
|---|---|---|
| Global sample rate | Aligns project with device | Set to 48 kHz in File → Audio |
| Windows sound | Prevents system-level mismatch | Pick 48000 Hz in playback device |
| Advanced audio properties | Ensures source rates match | Confirm each audio input capture rate |
| Monitor for drift | Keeps audio and video synced over time | Re-check properties before long sessions |
Keeping the same sample rate in both software and OS saves me time and gives reliable audio video results for every stream or recording.
Utilizing Custom Audio Devices
My go-to trick is embedding the console audio into the video source via a custom device option. This works best when the capture device exposes a separate audio channel and can send sound with the video feed.
Using a custom audio device lets me avoid an extra audio input capture source. That keeps my scene tidy and reduces the number of sources I must manage during a stream or recording.
I always test the custom audio device before a long session. I play a short clip on the game and watch the mixer and the advanced audio properties so I confirm the sound reaches the correct output and file.
Some devices require specific routing to work right. When that happens, embedding audio into the video source solves odd routing and utility conflicts without reworking the whole setup.
Tip: if audio seems off, re-open the video capture properties, switch to the custom device, and verify the input and monitor lines. Small checks save time and keep the final recording clean.

Improving Performance with Administrator Privileges
I run obs studio as an administrator on my windows PC before every session. This simple habit clears permission blocks so the software can access hardware without interruptions.
Granting elevated rights reduces odd freezes and unexpected crashes. I notice fewer device detection failures and more stable recordings when the program has full access.
It takes one right-click to launch with higher privileges, and that small step saves time later. I recommend it for anyone who wants a reliable setup.
- Prevents permission-related performance problems.
- Helps the studio software detect connected hardware consistently.
- Improves session stability and reduces troubleshooting during live runs.
| Action | Benefit | Quick Tip |
|---|---|---|
| Run as administrator | Reduces permission conflicts | Right-click the app and choose “Run as administrator” |
| Use consistent user account | Keeps permissions steady | Avoid switching accounts mid-session |
| Test before streaming | Confirms hardware is detected | Launch and verify devices 5 minutes early |
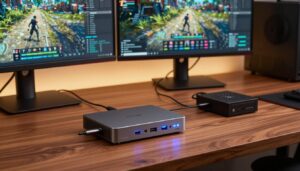
Selecting the Right Capture Card for Your Needs
The right purchase lets me focus on streaming, not fixing signal issues.
Beginner pick: I recommend the AVerMedia StreamLine MINI+ for newcomers. It offers 4K60 HDR passthrough for about $75 and gives great quality for the price. This device works well as a video capture device when you want simple plug-and-play performance.
Professional pick: For multi‑PC rigs I use the Elgato 4K Pro. It needs an open PCIe slot and runs near $250, but the stability and performance are worth it for pro streams and high-end game rigs.
I always confirm the default drivers are supported so the device installs cleanly. That saves time and reduces driver conflicts when adding a new video capture device to my setup.
Audio habits: I find audio input capture setup behaves similarly across modern models, so switching hardware rarely changes my routing. Choose the product that matches your stream goals and whether you need advanced features like 4K passthrough.
“Pick hardware that fits your workflow — it pays off every session.”
- AVerMedia StreamLine MINI+ — affordable, 4K passthrough.
- Elgato 4K Pro — pro performance, PCIe required.
- Check default driver support and properties before buying.
Conclusion
In closing, I highlight the quick routines that save time and keep your sessions stable. I have shared my expert tips on configuring your device so you can get a seamless, zero-lag recording experience.
By following these steps you can route audio and video correctly for professional-quality results. strong, small checks — like verifying sample rates and running the program with administrator rights — prevent many common problems.
I hope this guide helps you optimize your setup so you can focus on creating great content for your stream. Feel free to revisit these steps whenever you add new hardware to your recording environment.
FAQ
How do I add a video capture device source in OBS Studio?
What should I name my source for easy management?
How do I ensure audio from my capture device is monitored correctly?
Why is my video quality low after adding the device?
How do I match frame rates to avoid stuttering?
What causes audio and video desync, and how do I fix it?
How do I handle sample rate mismatches across Windows devices?
Can I use a USB capture device and a PCIe card together?
What is the best monitoring device choice for low-latency audio?
How do I use custom audio devices for specific sources?
What admin privileges improve performance?
How do I troubleshoot a device that Windows doesn’t recognize?
Why can’t I hear audio from my capture device in my headphones?
How do I prevent duplicated audio when recording and monitoring?
What bitrate and encoder should I use for high-quality recordings?
How do I fix a flickering or no-signal issue from my capture device?

Lucas Bennett is a video capture and streaming expert who specializes in helping creators build high-performance setups. He shares in-depth reviews, setup guides, and optimization tips focused on capture cards and real-time video production, making complex tech simple and effective.