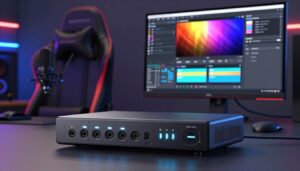
I’ll show you how to send game sound from your console into your headset while using a budget-friendly device like the Vivitar Creator Series HDMI to USB Video Capture Card. This 1080p device is $20 and offers solid video quality for stream recording.
I walk through initial settings in OBS Studio so your video capture device and audio input are recognized. You’ll learn how to set defaults on your desktop and adjust the menu so the game capture source appears cleanly.
My guide covers hooking the hardware, checking the input, and enabling monitoring so you can hear every in-game effect through your headset. These steps help keep stream recording and live streaming stable while keeping file quality high.
Key Takeaways
- I explain how to set up a cheap Vivitar device for 1080p game capture and sound monitoring.
- You’ll configure OBS Studio menu and input so the capture device works with your desktop.
- Adjust default audio settings to hear game sound in your headset while recording.
- Proper hardware setup and simple software tweaks improve stream recording quality.
- This workflow keeps game audio clear for play and streaming without complex gear.
Understanding Capture Card Audio Routing
I start by explaining how the signal flows from your console into your streaming PC. The device grabs both the video and the sound and sends them to your computer for processing.
When the signal arrives, your software decodes the video feed and the game sound separately. This split lets you adjust levels, mute sources, or monitor what you hear without disturbing the recording.
Proper routing keeps the video feed clean and prevents sync issues so viewers hear effects exactly as you intended. In short, your setup becomes a bridge between console output and your desktop sound system.
The steps below show how the flow works at a glance.
- Console HDMI out → device accepts video and game sound.
- Device sends a USB stream to your PC.
- Streaming software separates and lets you monitor the sound.
| Component | Role | Result | Tip |
|---|---|---|---|
| Console | Outputs game video and sound | Source signal | Use HDMI for clean feed |
| Capture device | Encodes video and sound | USB stream to PC | Enable pass-through if available |
| Streaming PC | Decodes and monitors | Record and live stream | Set monitoring device in software |
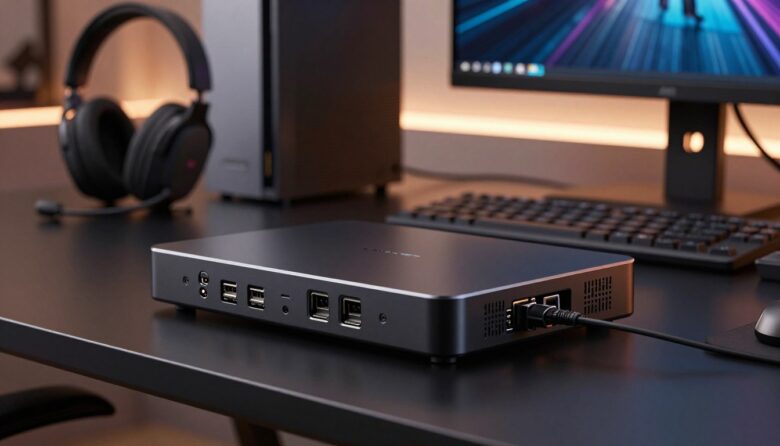
Essential Hardware and Software Requirements
Before you plug anything in, I outline the exact hardware and software you’ll need to get clean game sound into your headset.
Hardware Connections
I recommend double-checking every cable and port. A loose HDMI or USB lead will break your video and sound chain.
Use quality HDMI and USB cables to link your game console, device, and Windows PC. Proper connections reduce glitches and improve both video capture and in-headset monitoring.
- Console HDMI → device HDMI in
- Device HDMI out → TV or monitor (pass-through)
- Device USB → PC for video capture and input detection
Software Prerequisites
Install the latest drivers for your capture device and update your streaming software. I always check for driver updates before recording.
Set the default input in Windows so the interface is recognized. Then open OBS or your chosen software and confirm the video capture source and input levels.
Tip: Verify your default audio source after driver install to avoid missing sound during a stream or recording.
Configuring Your Capture Card in OBS Studio
Begin in OBS by creating a fresh video capture device source and selecting the hardware you plugged in.
I open the File menu and choose the source type from the list. Then I pick the correct device and confirm the video preview appears.
Next I check that the audio input is assigned to the same device so game sound flows into OBS. I keep labels clear so the source and input are easy to spot in the mixer.
Click the gear icon beside the source to reach advanced settings. I set resolution, frame rate, and disable unnecessary processing. This reduces CPU load and keeps the screen feed smooth for viewers.
Quick checklist:
- Add video capture device source in OBS Studio.
- Verify device and audio input are matched.
- Use the gear menu to fine-tune settings and desktop balance.
| Step | Action | Result |
|---|---|---|
| Add source | Select video capture device from menu | Console video appears in preview |
| Assign input | Set audio input to same device | Game sound routes into OBS |
| Adjust settings | Open gear, set resolution and FPS | Smoother recording and streaming |
Setting Up Dedicated Audio Input Sources
To separate game sound cleanly, I assign a dedicated input in my software and label it clearly. This keeps desktop noise out of my recordings and gives me precise level control.
Selecting the Correct Audio Interface
First, I choose the interface that the device exposes to Windows. Then I add a fresh audio input source in OBS or my chosen software. I make sure the game feed appears as its own device so it won’t mix with system sound.
- Check device name: Confirm the capture device shows in Windows sound settings and in OBS.
- Create a separate source: Add an audio input source and select the game feed, not the desktop speaker.
- Label clearly: Use a name like “Game Input – HDMI” so it’s obvious in the mixer.
- Verify defaults: Ensure your default playback and recording devices don’t override the new input.
- Monitor independently: Enable monitoring for that source so you hear only the game during streaming or recording.
Tip: Keep levels conservative at first, then adjust while you test a short recording. A dedicated input makes it simple to balance game sound against mic levels for a cleaner stream.
Mastering Advanced Audio Monitoring Properties
I show how to enable advanced monitoring so you can hear game sound in your headset while the stream still receives the same feed. This step keeps your live mix intact and helps you catch level problems fast.
Enabling Monitor and Output
Open the advanced properties for your game input in OBS and select Monitor and Output. That tells the software to send the sound to both the stream and your local device.
Be careful with volume. Start low and test a short recording to confirm the levels.
Understanding Monitoring Modes
OBS offers modes like Monitor Off, Monitor Only, and Monitor and Output. Use Monitor Only to troubleshoot if you can’t hear sound from the capture device.
Selecting Your Monitoring Device
Choose the correct playback device in the File → Settings → Audio menu so your headset receives the feed. Set defaults in Windows if needed to avoid conflicts.
- Tip: If you lose sync, switch monitoring modes to isolate the problem.
- Tip: Confirm the device name in Windows and OBS to prevent silent inputs.
| Action | Result | Why it matters |
|---|---|---|
| Enable Monitor and Output | Hear game in headset | Verifies the stream and local mix |
| Pick monitoring device | Routes sound to correct headphones | Prevents stray desktop playback |
| Toggle modes | Isolates issues | Quick troubleshooting during streaming |
Adjusting Global Audio Settings for Better Quality
I adjust Windows and software sample rates together so the game feed stays stable during recording. This small step stops common sync and noise problems before they start.
Open the File menu in your streaming software and check global settings. Set the sample rate to match your capture device and the same rate in Windows sound settings.
Set the default playback and recording devices so your headset always receives the game input. That makes monitoring consistent and avoids surprise drops during a stream.
- Match sample rates inWindows and software to the device requirement.
- Choose the correct default device for playback and recording.
- Keep global levels conservative and test a short recording.

Fine-tuning these settings improves overall quality and reduces troubleshooting later. Do a quick test file after changes to confirm the video capture and sound output behave as expected.
Troubleshooting Common Audio Sync Issues
Noticing a lag between what you see and what you hear? Start with simple tests. I run a short local recording first, then watch for drift over a minute.
If the problem grows over time, use the sync offset in your audio settings. Add small increments (10–50 ms) until video capture and sound match. Test after each change.
Correcting Audio Drift
If you play on a Nintendo Switch, check the HDMI pass-through and any dock settings. The Switch sometimes needs extra offset compared with other devices.
Also inspect hardware: loose HDMI or USB leads can cause crackle or dropouts. Swap cables and try another USB port to rule out the device or PC port.
| Symptom | Quick Fix | When to escalate |
|---|---|---|
| Gradual drift | Apply sync offset in software; test short file | Drift persists after offset |
| Intermittent crackle | Replace HDMI/USB, check grounding | Noise continues on multiple systems |
| No sound in headset | Verify monitoring device and default output in Windows | Device not listed in software |
Tip: Keep changes small and test each one. That method helps you isolate whether the issue is software, settings, or hardware. With these steps, your stream and recordings will stay tight and professional.
Managing Audio Distortion and Crackling
A surprising source of hiss and pops is a mismatched sample rate between devices and software.
I set both Windows and OBS to 48 kHz first. That single change often clears up most distortion and keeps your game capture sounding clean.
Next, I open the device properties in Windows and check the input format for the capture device. If the device and software disagree, the result can be clicks, crackles, or dropouts.
If problems persist, I isolate hardware from software. I test the same console and device on another USB port or PC to see if the noise follows the device.
When software settings look right, I update drivers and lower buffer sizes slowly while testing short recordings. Small changes help me pinpoint whether the issue is the device, the OS, or the streaming software.
Quick checklist:
- Match sample rates (48 kHz) in Windows and OBS.
- Verify device properties and default input to avoid conflicts.
- Test on another port or system to identify hardware faults.
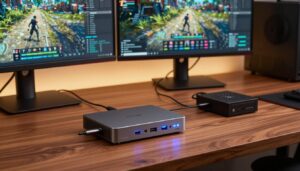
Comparing Popular Capture Card Models
I compare the strengths and trade-offs of popular capture devices so you can pick what fits your setup.

Elgato HD60 X ($150) is a solid mid-range choice. It offers reliable 1080p60 performance and wide support in streaming software. I like it for easy setup and consistent results.
AVerMedia GC553G2 ($180) adds extra features for creators who want a bit more headroom. It handles higher bitrates for smoother game video and gives flexible input options.
Elgato 4K Pro ($250) suits users who need 4K60 recording. It’s pricier, but the quality boost helps future-proof a studio. I recommend it only if you need true 4K output.
AVerMedia StreamLine MINI+ ($75) and the Elgato Game Capture Neo ($80) are budget-friendly picks. They work well for beginners who want dependable capture without spending much.
Using Elgato gear often simplifies setup because of broad software support. If your priority is stable recording and minimal fuss, that can be a big advantage.
| Model | Price | Best for | Notes |
|---|---|---|---|
| Elgato HD60 X | $150 | Streaming & recording 1080p60 | Easy setup, strong software support |
| AVerMedia GC553G2 | $180 | Higher bitrate video | More input flexibility, solid performance |
| Elgato 4K Pro | $250 | 4K60 recording | Premium quality, higher cost |
| StreamLine MINI+ / Game Capture Neo | $75–$80 | Budget beginners | Good value, compact and reliable |
Optimizing Your Setup for Different Consoles
Each gaming system handles sound slightly differently, so I adjust console settings per model before the feed reaches my PC. Small changes at the source prevent format mismatches and keep my headset mix clean.
PlayStation Audio Settings
On PS5 I go to Settings → Sound and set Output Format to Linear PCM. That ensures the capture device receives an uncompressed signal.
I also confirm the HDMI output is enabled and that voice chat isn’t forcing a different channel. After changing these settings, I test a short recording to verify levels in OBS.
Xbox Audio Configuration
On Xbox Series X I open Profile & system → Settings → General → Volume & audio output. I pick Stereo uncompressed for HDMI output so game input stays compatible with my card.
Next, I check Windows and my streaming software to make the capture device the default input for game capture. Finally, I enable monitoring so I hear the game in my headphones while the stream records cleanly.
Utilizing External Tools for Audio Control
I often rely on small third-party tools to tame complex channel setups when Windows and streaming apps fall short.
LineIn and similar utilities let me reroute a sound input to a chosen playback device. They add quick volume control, simple mixing, and per-source mute without changing system defaults.
These tools help me manage my audio input and keep game sound balanced against my mic. I use them when I need extra flexibility beyond native settings.
- Use the tool to map an input to your headset and test levels.
- Keep the sample rate consistent in both the app and Windows settings.
- Label each channel so your interface stays clear during a live stream.
| Tool | Benefit | Quick tip |
|---|---|---|
| LineIn | Simple input pass-through | Set low latency mode |
| Virtual mixer | Per-source mixing | Save a preset for streams |
| Loopback app | Advanced channel routing | Route mic and game sound separately |
Tip: Add these tools slowly and test a short recording. That way your input stays balanced and your stream sounds consistent.
Conclusion
Conclusion, I kept this guide practical so you can get clean game capture and hear audio in your headset without fuss.
Follow the checklist in OBS Studio and set the correct source and audio settings once. Test a short file to confirm your video capture and stream recording work as expected.
I recommend periodic checks of the capture device, desktop defaults, and hardware cables. Small tweaks to the monitor settings help keep screen and sound in sync.
With this setup, your streaming gear will deliver steady quality and let you focus on gameplay and community. If you want, I can walk through any step live or troubleshoot specific hardware.
FAQ
How do I route console game audio through my Elgato device and also hear it in my headset?
Why do I only get game sound in the stream but not in my headphones?
Can I use both my TV speakers and a headset at the same time?
How do I fix lip-sync or audio delay between video and sound?
What should I do if the captured sound is distorted or crackling?
Which OBS audio source type should I use for an external audio interface?
How do monitoring modes in OBS differ and when do I use each?
Is there a difference routing audio for PlayStation vs Xbox?
Do I need extra hardware to capture party chat or mic audio from the console?
What common OBS settings improve overall sound quality?
How can I troubleshoot when OBS doesn’t detect my Elgato device audio at all?
What’s the best way to avoid audio loops and echoes while monitoring?
Should I use an external mixer or just OBS for audio control?
How do I record separate audio tracks for game, mic, and party chat?
Are firmware and driver updates important for reliable sound?

Lucas Bennett is a video capture and streaming expert who specializes in helping creators build high-performance setups. He shares in-depth reviews, setup guides, and optimization tips focused on capture cards and real-time video production, making complex tech simple and effective.