I started using a proper mirrorless camera as my webcam over a year ago to record crisp, professional video from my office chair. Switching from a built-in laptop device to a dedicated camera set changed my online presence and improved my live streams.
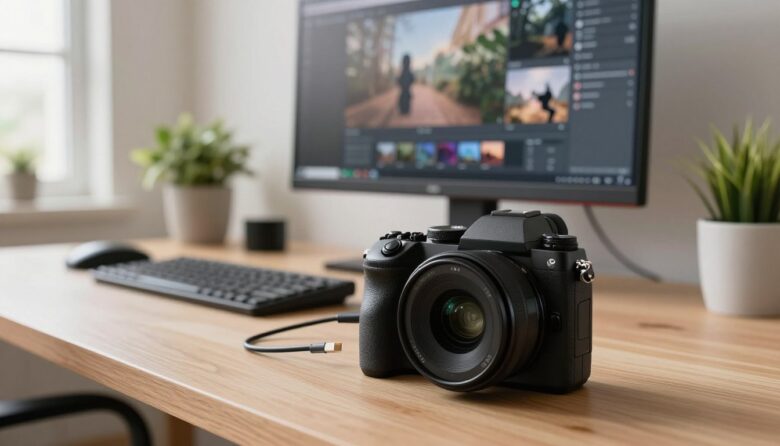
The Canon EOS Rebel SL3, with its 24MP APS-C sensor and clean HDMI output, is a great option for beginners who want better video quality and a shallow background blur. I will walk you through the best way to configure your equipment and software so your video feed looks sharp and natural.
In this short guide, I cover setup tips, battery and screen management, and how to pair a reliable usb microphone for clearer sound. I also explain how to use DSLR and other cameras to get that cinematic background and avoid the limits of a standard usb webcam.
Key Takeaways
- Using a dedicated camera dramatically boosts video quality over built-in devices.
- Canon EOS Rebel SL3 offers beginner-friendly clean HDMI output for easy setup.
- Pairing with a usb microphone and good lighting improves overall experience.
- Manage battery and screen settings to keep long sessions reliable.
- Simple software and clean hdmi connections avoid common video feed issues.
Why Upgrade to a Mirrorless Camera as a Webcam
I switched from a built-in device to a larger-sensor system and the improvement was immediate. The bigger sensor gave me clearer detail and better low-light performance, so my live streams felt more professional.
Silent operation mattered a lot. The mirrorless design skips the mechanical mirror, so there’s no loud shutter noise to distract listeners during recordings.
Autofocus also improved. Modern bodies track eyes and faces more reliably than many DSLRs, which kept me sharp on screen even when I moved around.
Depth of field control was another game changer. Using larger lenses let me blur backgrounds in ways basic webcams cannot mimic with software.
- I saw sharper feeds and cleaner low-light shots after the upgrade.
- Professional units give creative control over focus and exposure.
- Pairing this setup with good software and audio makes every broadcast feel higher quality.
“Upgrading to proper filming equipment was the simplest move that raised my on‑screen presence.”
Understanding the Difference Between DSLR and Mirrorless Systems
I like to start simple: the core distinction is how light reaches the sensor and how you view the result. That design choice changes handling, battery life, and workflow for streaming or recorded video.
Key Differences
Optical vs electronic viewing: Traditional reflex bodies use a mirror and optical finder. Newer electronic systems feed a live preview directly to the rear screen, so you see exposure and white balance in real time.
Size and power: Compact bodies are lighter and easier to mount on a monitor arm. Reflex units are often larger, but they can give longer battery life for long streams.
Benefits for Creators
I find that seeing the final exposure on an electronic display speeds setup. Better integration with capture software and on-screen overlays makes the streaming workflow smoother.
- I explain that the main difference is light delivery to the sensor.
- Compact systems suit a permanent webcam setup on a desk or arm.
- Reflex units may offer more value per dollar and endurance for long sessions.
“Choose based on budget, portability, and whether battery life or handling matters most to your long-term goals.”
Selecting the Right Camera for Your Streaming Setup
I focus on sensor size, continuous power, and clean output when I pick gear for streaming.
Entry level options like the Canon EOS Rebel SL3 offer a 24MP APS-C sensor and 4K video. That makes them a smart first choice for better image quality and shallow depth of field.
The Sony ZV-E10 II brings a 26MP APS-C sensor and 4K/60p for creators who want smoother motion. For a more traditional build, the Nikon D7500 is a solid mid-range dslr with reliable performance for long sessions.
- I check for a dedicated power option so the unit can run for hours without interruption.
- Confirm lens system compatibility to get the look you want for your videos.
- Visit the manufacturer’s site to verify support for the latest webcam software and firmware.
| Model | Sensor | Video | Best For |
|---|---|---|---|
| Canon EOS Rebel SL3 | 24MP APS-C | 4K | Beginners; clean HDMI output |
| Sony ZV-E10 II | 26MP APS-C | 4K/60p | Content creators; fast motion |
| Nikon D7500 | 20.9MP APS-C | 4K | Mid-range dslr users; robust system |
| Sony A7 IV | Full-frame | 4K high quality | Professional video quality |
Final tip: Choosing the right dslr mirrorless camera is a big decision. I always test menus and confirm battery options before buying.
The Importance of Clean HDMI Output
A clean HDMI feed removes overlays and delivers a pure live signal for streaming. In plain terms, clean hdmi means the device sends high-definition video without on-screen text, icons, or menus. That clarity matters when you want a distraction-free presentation.
Why It Matters for Live Feeds
Professional look: When the hdmi output is clean, your viewers see only the subject and background. No exposure numbers, focus points, or battery icons appear on the screen.
Workflow benefits: A clean hdmi signal makes capture via a capture card or via manufacturer software far simpler. Streaming software can grab the raw video feed without filtering out overlays.
- I always emphasize that clean hdmi is the most important feature to look for when using a camera as a professional webcam.
- If a unit lacks clean hdmi output, viewfinder text will show up in every live session and harm perceived quality.
- Use a high-quality hdmi cable and test the hdmi output before you go live to ensure a stable experience for viewers.
“Once you experience the clarity of a clean hdmi feed, you will never want to go back to a basic webcam.”
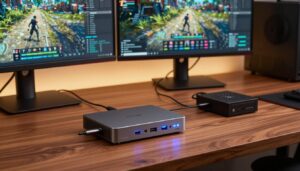
Connecting Your Camera via Capture Cards or USB Software
I compare two common ways to get a high-quality live feed: using an HDMI capture device or relying on manufacturer USB utilities.
Using HDMI Capture Cards
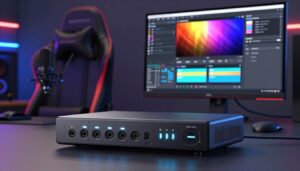
Elgato Cam Link 4K is my go-to HDMI-to-USB adapter. It recognizes your unit as a standard webcam and delivers a low-latency, consistent video feed.
For the clean hdmi look, a capture card gives the best quality because it preserves the clean hdmi output and avoids USB bottlenecks.
Utilizing Manufacturer Webcam Software
If you prefer simplicity, try the Canon EOS Webcam Utility or Sony Imaging Edge. These webcam utilities let you use a USB cable to stream without extra hardware.
I have tested the canon eos webcam utility and found it a reliable free option. Still, for long sessions, an hdmi capture path often feels more professional.
| Method | Hardware | Pros | Cons |
|---|---|---|---|
| HDMI Capture | Elgato Cam Link 4K | Low latency; clean hdmi; high quality | Extra hardware; cost |
| USB Utility | Canon EOS Webcam Utility / Imaging Edge | Simple setup; no capture card needed | Potential higher latency; lower max quality |
| Hybrid | Manufacturer software + capture | Flexibility; fallback options | More complexity |
- I always use a high-speed USB cable when running manufacturer software to reduce latency.
- Check the eos webcam utility compatibility list for your specific canon eos model before you commit.
“An HDMI capture card is the option I pick when I need rock-solid, professional video quality.”
Achieving the Perfect Camera Angle and Mounting
Placing your rig slightly above eye level gives the most flattering framing for meetings and live streams.
I mount my unit so the lens sits at or just above my eyes. That angle keeps my chin natural and avoids unflattering upward shots.

Use a sturdy monitor arm or an 11-inch articulating friction arm to secure your setup. A single monitor desktop mount can be repurposed to hold the unit and let it swing with your desk work.
Small adjustments matter: add a ball head for fine tilt and roll control. Tighten all fasteners and check the mount before long sessions.
- I place my device at eye level for natural engagement.
- A quality mount saves desk space and keeps the feed steady.
- A clean hdmi signal becomes more important when you use custom mounts—framing and quality must match.
| Mount Type | Best For | Pros | Cons |
|---|---|---|---|
| Monitor Arm | Desk setups | Stable; space-saving; adjustable | Needs clamp or grommet hole |
| 11″ Articulating Arm | Flexible positioning | Compact; precision tilt | Limited reach for large desks |
| Tripod + Ball Head | Temporary setups | Easy to reposition; precise framing | Takes desk space |
| Clamp Mount + Ball Head | Movable rigs | Secure; small footprint | Requires sturdy desk edge |
“A well-positioned camera is just as important as having a clean hdmi output for creating a professional streaming setup.”
Mastering Lighting for Professional Video Quality
A simple three-point lighting rig is the fastest way to get a professional, balanced look. I use this setup every time I stream or record to make my feed feel polished.
Setting Up Three Point Lighting
Key light: Place the main light at about a 45-degree angle to your face. This creates shape and brings out features without washing you out.
Fill light: Put a softer light on the opposite side to reduce harsh shadows. I often dial this down with a dimmer or use a diffuser to keep skin tones natural.
Back light: A rim or hair light behind you separates you from the background. Even a low-power LED makes a big difference for perceived quality.
I recommend dimmable bi-color LED panels that reach 5600K. That daylight balance keeps skin tones accurate and pairs well with most hdmi output settings.
- I always use three-point lighting to ensure my video quality is top-notch, even with a budget-friendly camera set.
- Make sure lights sit at 45 degrees and add diffusers to soften shadows.
- If you use a clean hdmi feed, proper lighting is the final touch to broadcast-grade results.
“Good light makes even modest cameras and microphones look like professional tools.”
Optimizing Audio for a High-End Experience
Clean, clear audio is the single quickest upgrade that makes a professional stream feel complete.
I never use the built-in mic on my laptop or camera for live shows. Room echo and distant pickup harm perceived quality faster than bad lighting.

Use a dedicated usb microphone. The Samson Q2U is my go-to recommendation because it delivers rich, natural voice with minimal fuss. You can plug it straight into your computer and test levels in streaming software before you go live.
A lavalier mic is a great alternative if you move around. Clip it to your shirt for even levels and less handling noise.
- I always tell creators that poor audio ruins a high-end video experience.
- Make sure audio levels are balanced before you start streaming.
- If you run a dslr or mirrorless camera, route sound to the computer for the best results.
“Invest in a good microphone—it’s as important as a clean hdmi feed for overall production value.”
Final Thoughts on Your New Streaming Setup
Final Thoughts on Your New Streaming Setup
In this article I showed how a dslr mirrorless camera can lift your live presence and make everyday streams feel polished.
I hope you feel confident to use dslr or mirrorless gear to craft a high-quality camera webcam feed. Try small changes first and iterate.
Start with a clean hdmi signal, steady hdmi output, and proper lighting. That combo improves video and overall viewer experience more than fancy software or expensive lenses.
Whether you pick a simple usb webcam or a fuller dslr mirrorless rig, focus on sound — a good microphone — and reliable connections. Keep creating; the best way to learn is to stream and refine.
FAQ
What do I need to use my DSLR or mirrorless device as a high-end webcam?
Can I use the camera’s USB connection without extra hardware?
What is clean HDMI and why is it important for live feeds?
Do I need a capture card or will software do the job?
How do I choose the right lens and settings for a streaming setup?
What mic options work best with a camera-based setup?
How do I power my device for long livestreams?
What’s the best way to mount and frame my shot?
How should I light my setup for a professional look?
Will autofocus work reliably during streaming?
How do I get the best image quality into streaming software like OBS?
Are there compatibility issues with macOS or Windows?
How do I reduce overheating during extended streams?
Can I use my device to livestream directly to platforms without a PC?
How do I sync external audio with the video feed?
What settings should I change to prevent the screen from turning off?
How do I keep my video feed looking consistent with different backgrounds?
Which brands offer the most reliable USB webcam utilities?
What should I check before every live session?

Lucas Bennett is a video capture and streaming expert who specializes in helping creators build high-performance setups. He shares in-depth reviews, setup guides, and optimization tips focused on capture cards and real-time video production, making complex tech simple and effective.